I’ve had this modification running in my espresso machine for about 1.5 years now and some final thoughts and wrapping up some detail. For some reason the popularity of this project spiked in the last couple months and wanted to answer some of the FAQs.
In my opinion, the purpose of this modification is to allow this espresso machine to extract any roasted coffee properly as opposed to only darker roasted or “espresso-roasted” coffee. In that sense, this project was a complete success. I no longer worry about if a coffee is too lightly roasted for an espresso machine and simply choose coffee based on the tasting notes and/or reputation of the roaster. It doesn’t give the machine the Midas Touch and turn everything into a god shot! You still need to know what you are doing but you just have an extra parameter to play with. It WAS worth doing for me. (This is a question I get alot…)
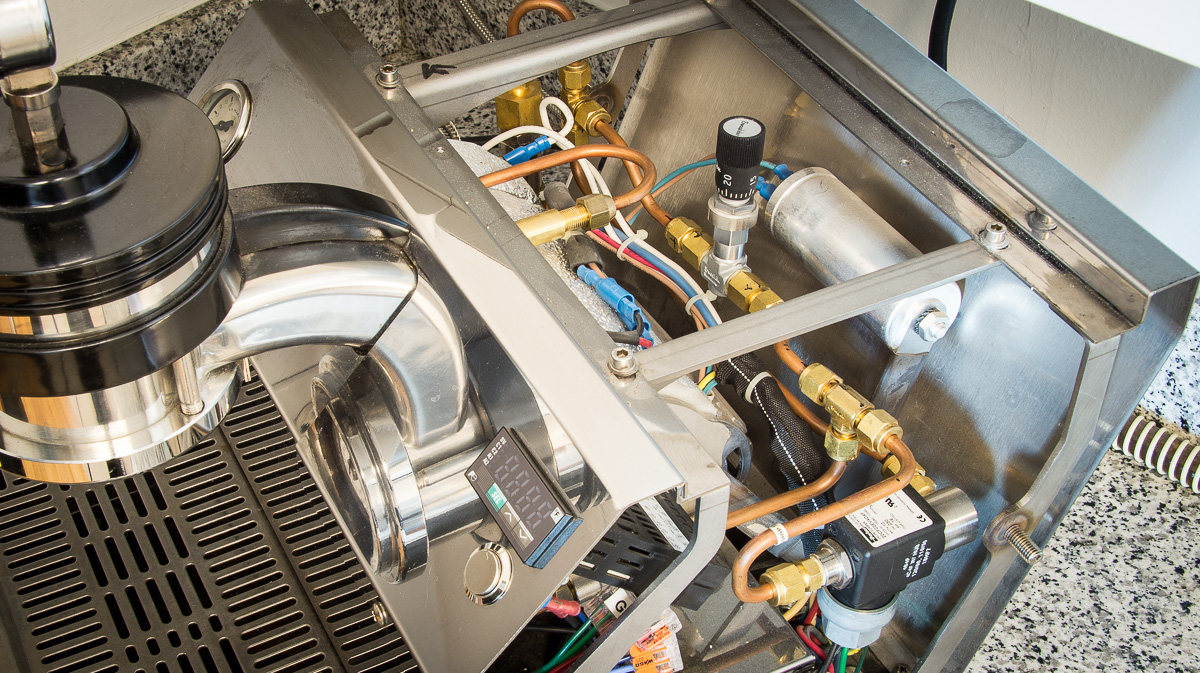
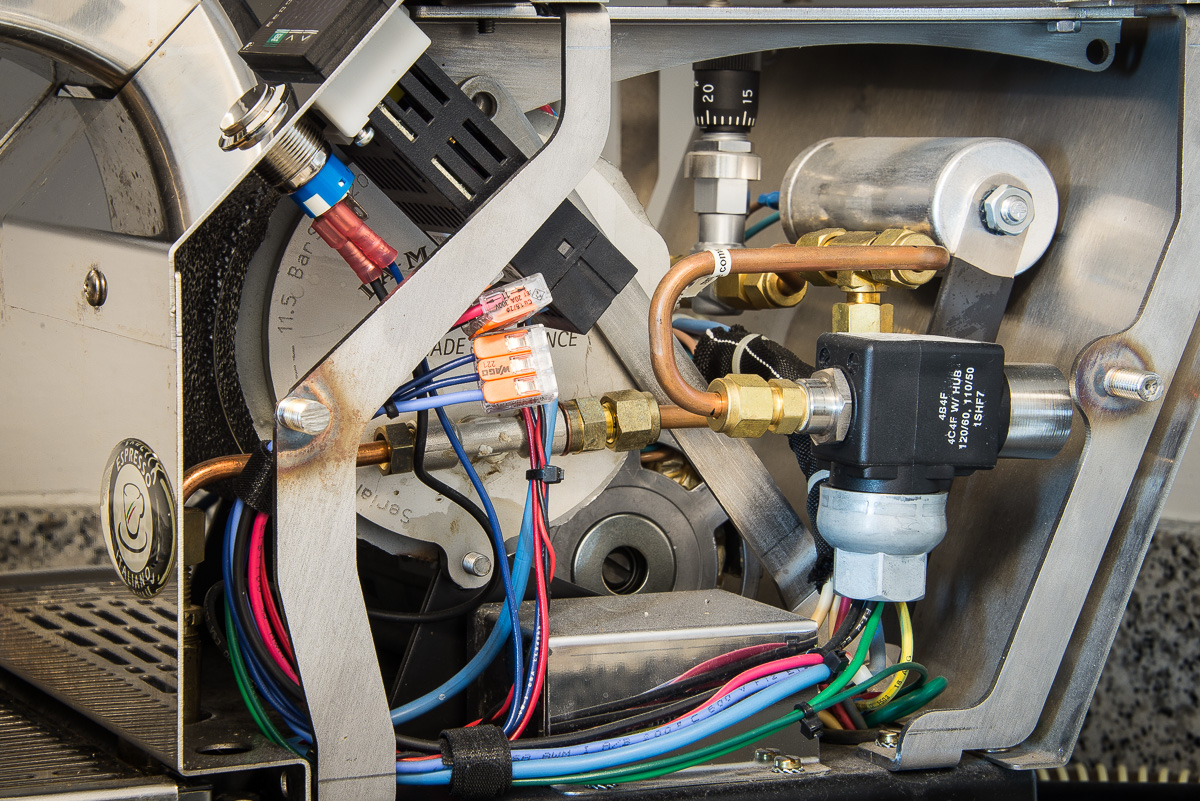
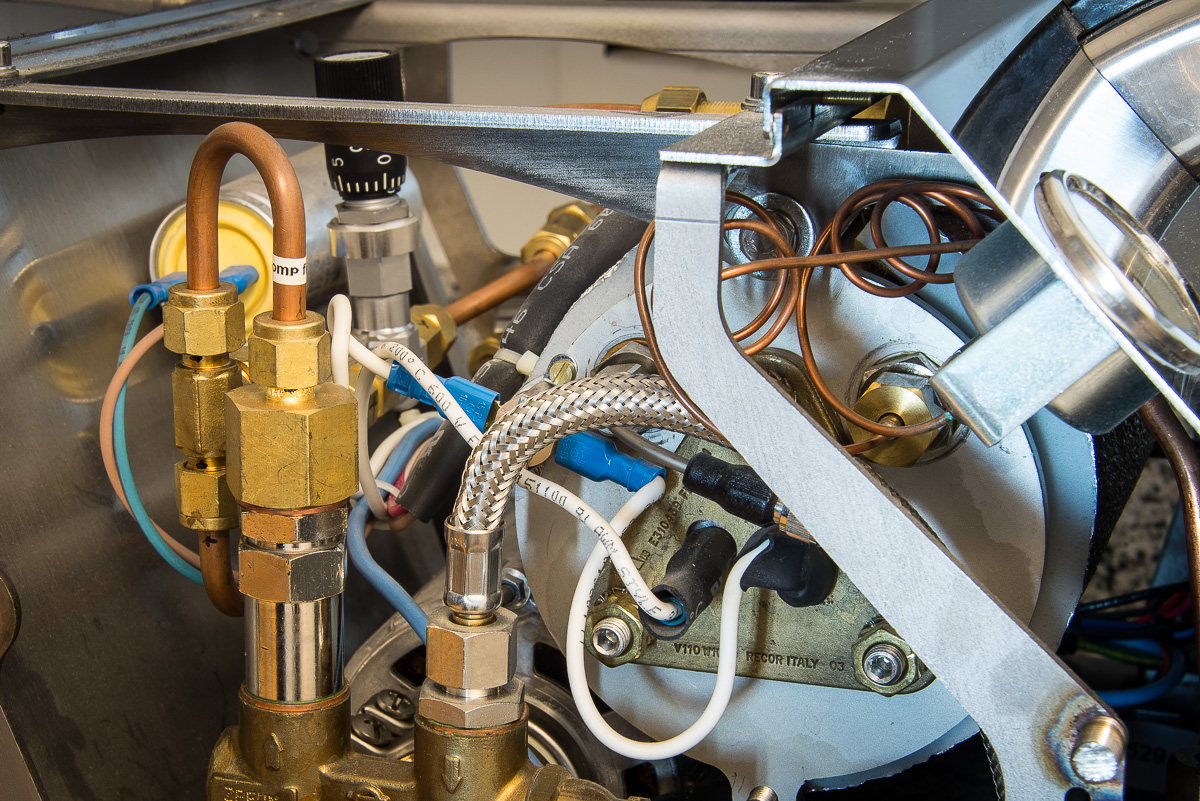
I’ve included some final photos and the full parts list below. I spent more money than I needed to on this, but it was a learning experience. I totally didn’t need to buy the dumb tube bender/cutter. Probably could have rented that somewhere. There are some comments in the parts list to what alternatives that I would get if I were doing it over again.
The last bit of detail is the electrical wiring of the solenoid valve. I originally connected it to the main power switch of the espresso machine but was having trouble tucking all the wires away when I realized the PID was also AC powered and already have the cabling running from the switch to right next to where the solenoid was going to be. I also originally used large terminal blocks to splice into that power until I discovered the wonderous wago lever connectors. They are smaller and safer (insulation-wise) than terminal blocks. I disconnected the power to the PID, plugged it into the wagos instead and fed the power from the wagos to both the PID and solenoid (through the switch). Everything ended up looking pretty clean and pro. I’m really happy with the result.


Parts List (in order of the water flow)
Pump Side:
CU-6-RP-2 3/8" Copper Gasket Crush Washer (Bought this to solve leaking during the first tests. Also tried the PTFE gaskets but these were better)
B-400-7-6RG 1/4" OD Compression Fitting X 3/8" Female ISO (BSP)
B-400-3 1/4" OD Compression Fitting TEE
Needle Valve Path:
B-400-7-2 1/4" OD Compression Fitting X 1/8" Female NPT (2x)
SS-2MG2-MH 1/8" Male NPT Metering valve. ("-MH" changes to the “Vernier Handle”)
*Should have gotten the SS-4MG-MH . 1/4" compression fittings instead of NPT to skip the B-400-7-2 adapters
Solenoid Path:
B-42S4 1/4" OD Compression Fitting Ball Valve (Temporary. Replaced with solenoid valve later. Kinda of a waste of money)
B-400-1-2 1/4" OD Compression Fitting X 1/8 Male NPT
20CF02EV4C4F 1/8" Female NPT 110V AC Parker Solenoid Valve (Conduit Cabling)
*Should have gotten 20CF02EV4B4F. Same thing except it doesn’t have that piping threads over the wiring (cosmetic)
19mm Stainless Switch - Generic push-button switch from ebay.
Boiler Side:
B-400-3 1/4" OD Compression Fitting TEE
B-400-1-2RS 1/4" OD Compression Fitting X 1/8" Male ISO (BSP)
CU-2-RP-2 1/8" Copper Gasket Crush Washer
Extras:
MS-HTB-4T 1/4" Tube Bender
MS-TC-308 Tube Cutter
MS-TDT-24 Tube Deburring Tool
SRC-CU-T2-S-030-10 1/4" Copper Tubing 3rd party. Not standard swagelok part number
B-400-SET Ferrule Set 1/4" - extra ferrules if you want/need to redo the copper tubing to the compression fittings. Remember to loosen the compression fitting connections first BEFORE unscrewing the NPT adapter side. I twisted/broke the copper tubing more than once forgetting to do this, which is why I needed extra ferrules. You can see in the photos that I added labeling on the copper tubing to remind me of this!)
Amazon Stuff:
Female Disconnect Double Crimp Insulated - Connectors to the switch.
18 AWG Hook Up Wire kit
221-413 Wago LEVER-NUTS 3 Conductor - Spliced the solenoid power into the PID power (also AC)
Step Drill Bit - To drill the 19mm hole for the switch
Center Punch - To prime the hole for the drill
Tap Magic Industrial Pro Cutting Fluid - Trust me, get the cutting fluid!
On Swagelok.
Swagelok is a high quality, expensive brand for all of these fittings. I think its worth it for an espresso machine application. Also, my local dealer was extremely helpful hunting down all these part numbers. I basically sent them a weird napkin drawing of what I wanted and they worked it all out. While chatting with them, I could tell that my orders were much lower volume than they usually deal with so I think they were being extremely kind by being so helpful for probably minimal return on their side. When I was ordering the tools, they even offered to let me come in and spend a few hours there to just borrow the tools so I didn’t have to buy them! From my point of view, this is the kind of service that makes me not second-guess the extra cost of the brand.